
Last updated October 16, 2026
 Water damage drying
 Fire & smoke cleanup
 Mold remediation
 Storm response
 Sewage cleanup
 Reconstruction
Free visual inspection and a written scope of work before any mitigation begins - photos, moisture readings, and drying logs go in your claim file
The scope we write is the scope we bill. Anything new gets shown to you, in writing, before we touch it.
Get your free estimateThe Complete Guide to Damage Restoration in Austin
In February 2021, Austin homeowners filed over 4,200 water damage insurance claims in a single month. Six weeks later, restoration crews across Travis County were still tearing out drywall, because one phase of the job, structural drying, had been rushed or skipped entirely. The mold was already inside the walls. Damage restoration is not one event. It is a sequence of five distinct phases, each with its own timeline, cost trigger, and failure point. This guide maps every one of them, phase by phase, so you know exactly where you are, what happens next, and what any contractor you hire in Austin should never skip. For damage restoration warning signs every Austin homeowner should know, see our companion guide.
Restoration work we handle
Quick Answer
Damage restoration in Austin means moving through five phases in order: emergency extraction, structural drying, moisture mapping, remediation, and rebuild. Most jobs take five to fourteen days from first call to final walkthrough, and cost between $3,500 and $17,000 depending on square footage and water category-see our Damage Restoration Cost Breakdown: The Austin Homeowner’s Reference for 2026 for detailed pricing. The single most important protection you have is a written scope of work with line-item pricing before any tool touches your wall.
Table of Contents
- Phase 1: Emergency Extraction (Hour 0 to Hour 4)
- Phase 2: Structural Drying (Day 1 to Day 4)
- Phase 3: Moisture Mapping (Ongoing, Day 1 to Day 7)
- Phase 4: Remediation (Day 2 to Day 10)
- Phase 5: Rebuild and Final Verification (Day 5 to Day 14)
- How Austin’s Clay Soil and Pier-and-Beam Foundations Change Everything
- What the IICRC S500 Standard Actually Requires
- The Cost Triggers That Jump a Job From Category 1 to Category 3
- Common Mistakes to Avoid
- When to Call a Professional
- Frequently Asked Questions
- The Bottom Line
Phase 1: Emergency Extraction (Hour 0 to Hour 4)
The first four hours determine how much of your house survives. Water moves through drywall, subfloor, and insulation at a rate that surprises most Austin homeowners. A ruptured supply line behind a kitchen cabinet can wet 400 square feet of flooring before you even walk in the door. Emergency extraction means pulling standing water out with truck-mounted or portable extraction units before it migrates into wall cavities and under baseboards.
What should happen in this phase, hour by hour:
- Hour 0 to 1: You call. A live person answers, asks three questions (water source, square footage affected, whether electricity is on), and gives you an arrival window you can track. If a company sends you to voicemail after a water event in Austin, call someone else. Every hour of delay adds roughly $200 to $400 in additional drying and demolition cost.
- Hour 1 to 2: A technician arrives, shuts off the water source if it has not been shut off, and documents the scene with photos before anything is moved. That pre-existing condition documentation matters for your insurance claim.
- Hour 2 to 3: Standing water is extracted. In a typical 1,500-square-foot Austin home with a burst pipe in the hallway, a professional unit pulls out 200 to 600 gallons in under an hour. Carpet pad is almost always discarded; it cannot be dried reliably and costs more to attempt than to replace.
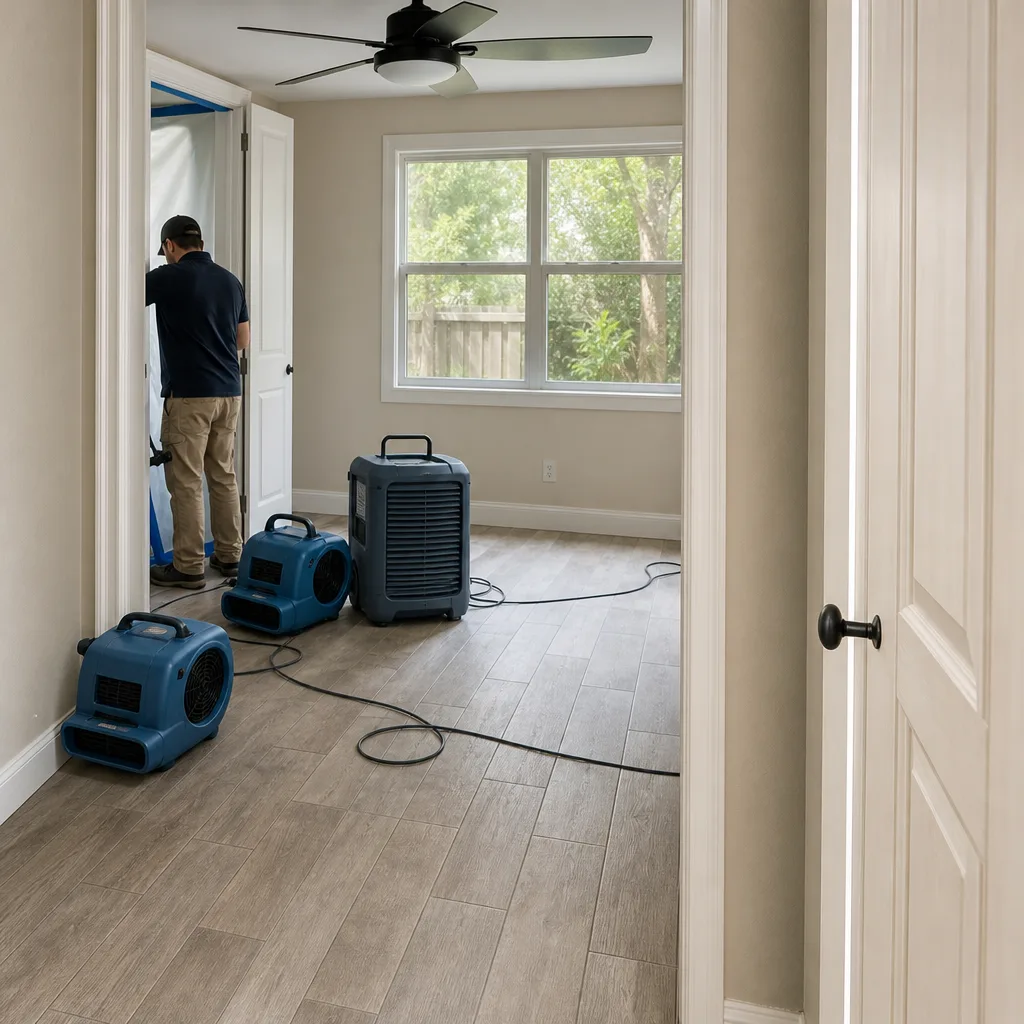
- Hour 3 to 4: The technician cuts away saturated drywall in 2-foot increments above the water line, removes baseboards, and positions the first air movers and dehumidifiers. The goal is not dry yet; it is stopping the spread.
One thing Austin homeowners notice quickly during extraction is that the water is never just water. It is carrying whatever was in the wall: dust, insulation fibers, sometimes sewage if the source was a backed-up line. That is why the next phase exists, and why skipping straight to cosmetic repair is the most expensive mistake a restoration company can make on your behalf.
Phase 2: Structural Drying (Day 1 to Day 4)
Structural drying is where most restoration jobs are won or lost. It is also the phase most homeowners never see, because it happens over three to four days while you are staying with family or in a hotel. You leave the fans running and trust the contractor. That trust is only justified if the contractor is using psychrometric drying, not guesswork.
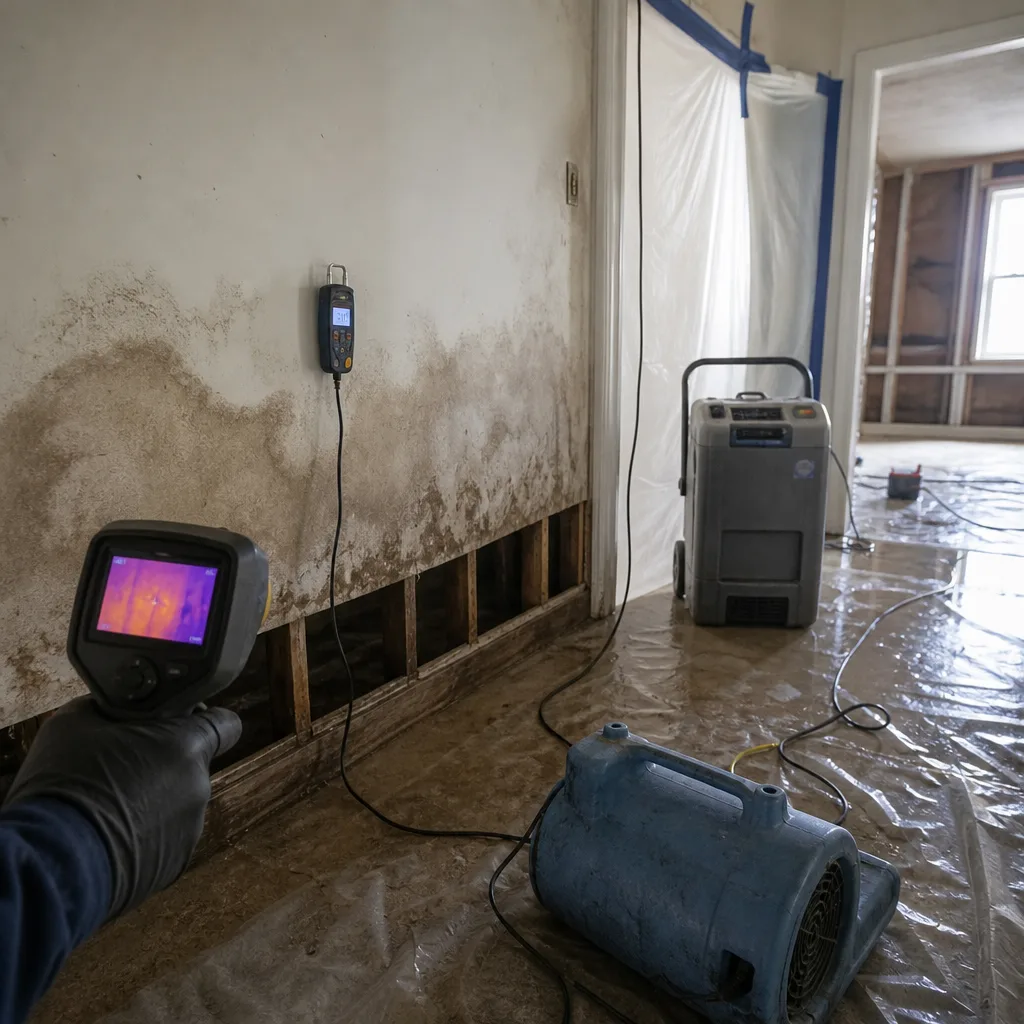
Psychrometric drying means tracking the air’s moisture level with instruments, and measuring the moisture content inside the affected materials, so you know when your home is truly dry, not just surface-dry. A wall can feel dry to the palm of your hand while holding 40% moisture content inside the drywall. Mold needs moisture, oxygen, and an organic food source; drywall supplies the food source. Austin’s hot, humid climate from May through October makes this phase harder, because the outside air your home exchanges with is itself carrying moisture. A properly sealed drying chamber with professional water damage restoration in Austin equipment matters more here than in a dry climate like Phoenix or Las Vegas.
What a legitimate drying setup looks like:
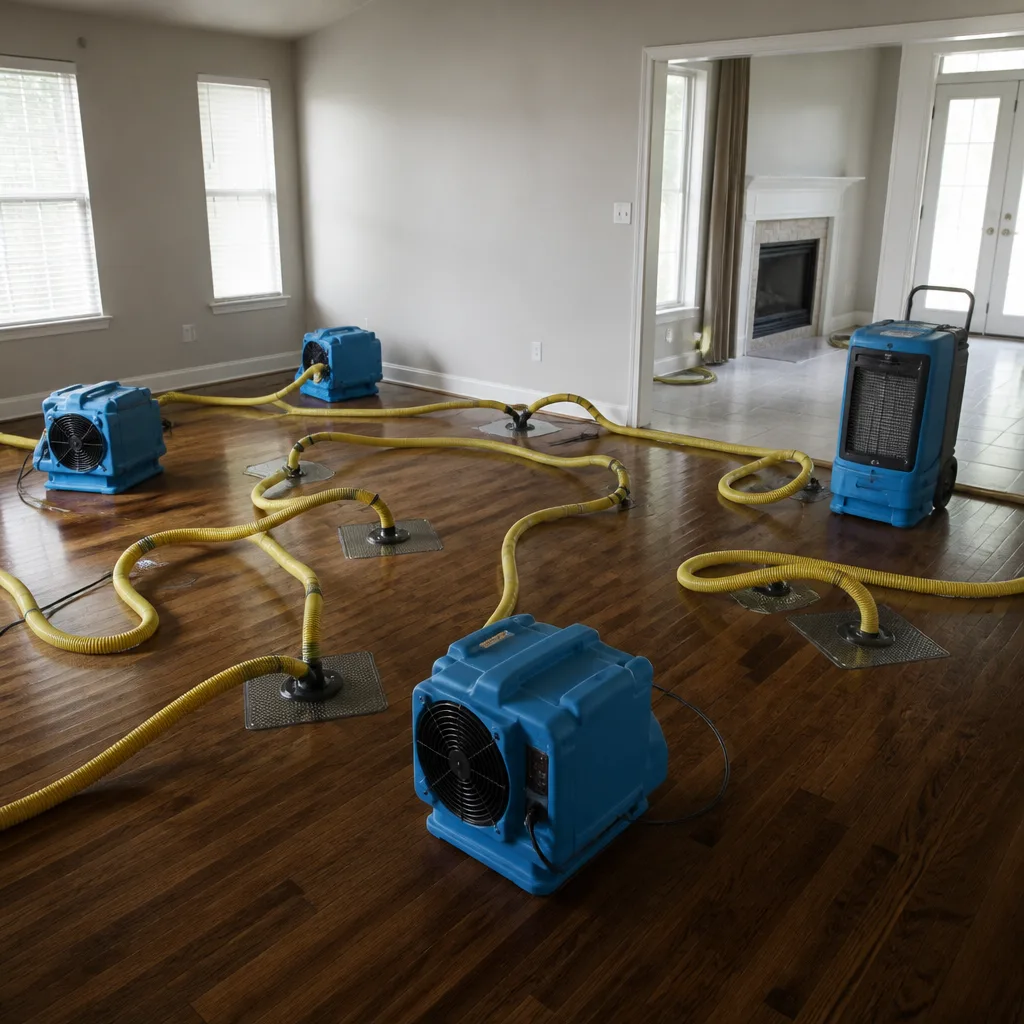
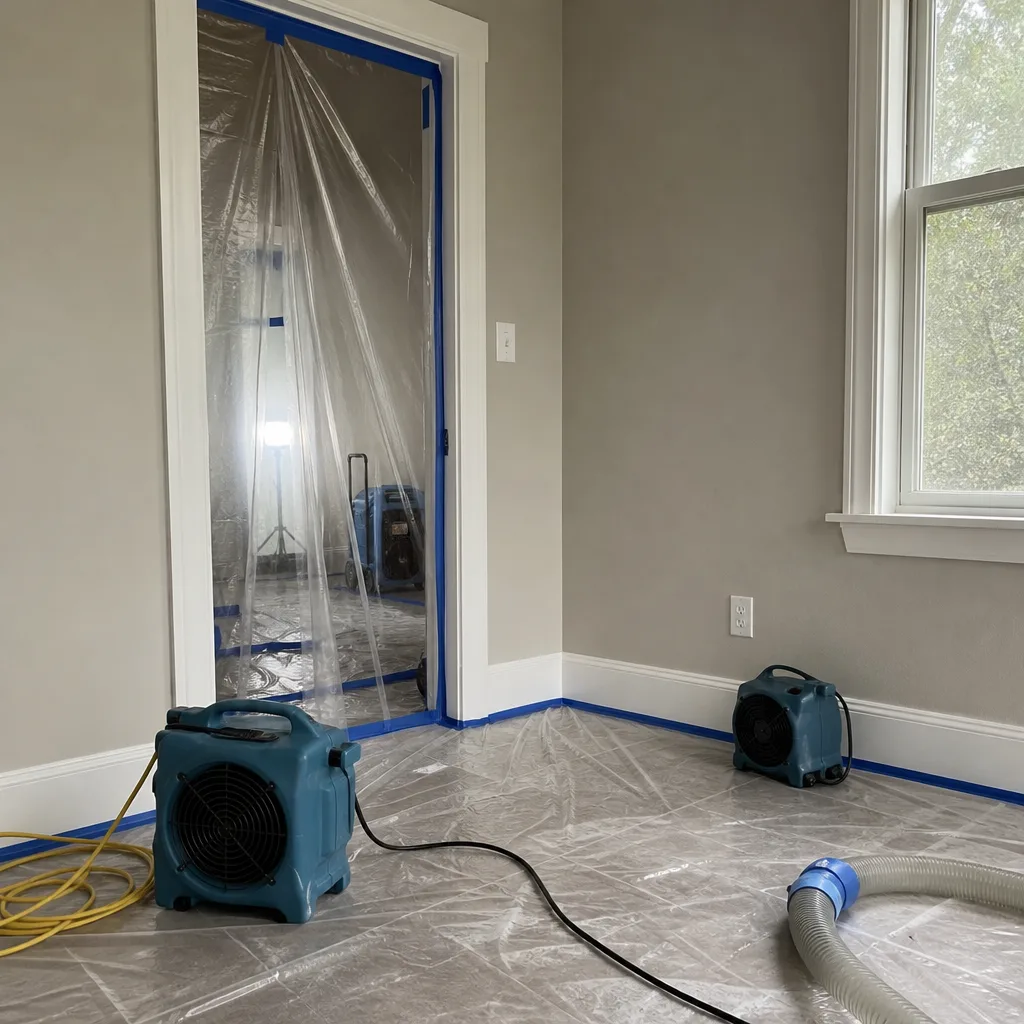
- Air movers positioned to create a specific airflow pattern across wet surfaces, not just pointed randomly at the room.
- Dehumidifiers sized to the cubic footage and the class of water loss. An Austin home with 1,000 square feet of wet flooring typically needs two to four portable dehumidifiers running in tandem.
- Daily moisture readings documented in writing. If your contractor cannot show you a log of moisture readings per area, per day, you are paying for drying without evidence it happened.
- Drying targets based on the material’s dry standard. Drywall in a wall cavity should return to below 10% moisture content. Hardwood subfloor needs different thresholds than tile or concrete.
We run Dri-Eaz, Phoenix, and XPOWER equipment on drying jobs because those brands hold calibration and output over multi-day deployments. The equipment is not the point. The measurement discipline is the point.
Phase 3: Moisture Mapping (Ongoing, Day 1 to Day 7)
Moisture mapping is the documentation layer that runs underneath everything else. It is how you prove to your insurance adjuster that the damage was as extensive as the drying bill says it was, and it is how you prove the home is actually dry before rebuild begins. In Austin, where most homes sit on slab foundations or pier-and-beam, moisture mapping is also the only reliable way to know whether water traveled under walls into rooms that look untouched.
The process is straightforward. A technician uses a non-invasive moisture meter on every surface within a defined perimeter of the original water source, then records the readings on a floor plan or grid. Those readings are compared against baseline readings taken from unaffected areas of the same material. A hallway floor reading 32% moisture while the bedroom closet reads 8% tells you the water ran sideways under the baseplate before it soaked upward.
What you should ask for from any contractor doing moisture mapping in Austin:
- A written map, not a verbal summary. You want the data.
- Readings taken with both non-invasive and penetrating meters. Non-invasive meters read through the surface; penetrating meters use small pins to read inside the material. Both have blind spots.
- Documentation of the unaffected baseline, so the comparison is explicit and not assumed.
- Re-mapping after drying completes, confirming all affected areas have returned to dry standard before rebuild starts.
Insurance adjusters routinely deny portions of claims because drying was not documented to the standard the policy requires. The IICRC S500 standard, which we follow on every job, gives adjusters a defensible reference point. When your contractor’s documentation matches that standard, you are in a much stronger position than if you are relying on a contractor’s word that the walls were dry.
Phase 4: Remediation (Day 2 to Day 10)
Remediation is the phase where anything that cannot be dried safely gets removed, and anything that got wet but can be saved gets treated to prevent microbial growth. The word covers two different jobs that Austin homeowners often conflate: water damage remediation (removing wet, unsalvageable material and treating what remains) and mold remediation (removing active mold growth and addressing the moisture source that caused it).
Mold remediation in Austin follows a different protocol than water damage drying. It requires containment, negative air pressure, and antimicrobial treatment applied to affected surfaces. It also requires addressing the moisture source, because treating mold without fixing the water problem guarantees the mold comes back. We have seen Austin homes where a contractor painted over mold on a bathroom ceiling, charged $800, and was back seven weeks later because the roof leak above the bathroom was never fixed. Mold remediation in Austin done correctly always starts with moisture, not bleach.
What gets removed during remediation:
- Drywall that has been wet for more than 48 hours or shows visible mold growth.
- Insulation that has been wet at all. Wet fiberglass insulation loses its R-value permanently and becomes a mold substrate.
- Carpet and pad that absorbed Category 2 or Category 3 water, even if it looks salvageable.
- Baseboards, door casings, and trim that have swelled or separated from the wall.
- Any porous material that was in contact with sewage, regardless of how long it was wet.
Antimicrobial treatment follows removal. The most commonly used treatments in this industry are EPA-registered for their labeled uses, and they are applied after the area is dry or as a surface treatment during demolition, depending on the product. We treat according to the label and the IICRC standard, not according to what a previous contractor “always does.”
One thing that surprises first-time claimants in Austin: remediation and rebuild are rarely done by the same crew on the same day, and that is a good sign. A company that tears out wet drywall at 10 a.m. and is hanging new drywall by 3 p.m. is cutting corners on drying and likely ignoring damage restoration permits, codes & inspections in TX. There is a mandatory drying verification step between Phase 4 and Phase 5. If your contractor does not mention it, ask.
Phase 5: Rebuild and Final Verification (Day 5 to Day 14)
Rebuild is the phase where your house starts looking like a house again. It is also the phase where cost overruns are most common, because rebuild is where the original estimate meets the reality of what is behind the walls. A good contractor writes the rebuild scope after demolition, not before, so the price reflects what was actually found.
Rebuild scope typically includes:
- Structural framing repair: Replacing any studs, joists, or subfloor sections that were damaged by water or mold. In Austin’s older pier-and-beam homes, this can include sill plates and floor framing, not just the visible drywall.
- Insulation replacement: Matching the existing R-value. Austin building code has minimum insulation requirements that have changed over the years; a competent contractor brings the repaired section up to current code, not just back to what was there.
- Drywall hanging, taping, and texturing: Austin homes are full of textured walls and ceilings, and matching texture is an art. A bad match is visible from across the room for the rest of the time you own the house.
- Primer and paint: Usually done in two coats over fresh drywall, with primer first to seal the surface.
- Flooring replacement: This is often the most expensive single line item, especially if the original flooring was hardwood or tile and the insurance policy only covers “like kind and quality” replacement.
- Trim and finish work: Baseboards, door casings, and any cabinetry or built-ins that had to be removed.
Final verification means walking the home with a moisture meter after rebuild, confirming zero elevated readings in the repaired areas, and reviewing the before-and-after photo documentation with you. A written guarantee should be part of this phase. The 365-Day Done Right Promise at Wendell Restoration Austin means if it is not done right, we make it right, stated in writing on every job. If a contractor will not put a guarantee in writing, the guarantee does not exist. You can learn more about our water damage repair approach in Austin, including what our written scope of work includes.
How Austin’s Clay Soil and Pier-and-Beam Foundations Change Everything
Most online restoration guides are written for slab-on-grade homes in generic American subdivisions. Austin is different. A large share of the housing stock here sits on expansive clay soil, and the older neighborhoods, Hyde Park, Bouldin, Travis Heights, Crestview, are dominated by pier-and-beam foundations. Those two facts change how water moves through your house after a leak or a freeze.
Expansive clay soil swells when wet and shrinks when dry. During Austin’s hot, dry summers, the soil pulls away from the foundation, opening small gaps at the perimeter. When a pipe bursts inside the house, water runs down into those gaps and travels along the foundation wall, sometimes wetting subfloor and framing from below in areas far from the original leak. A moisture map that only checks the surface of the floor in the room where the leak happened will miss this entirely.
Pier-and-beam homes have a crawlspace. Water that gets under the floor can sit in the crawlspace, raising the ambient humidity under the entire house and wicking up into the floor framing, joists, and subfloor even in rooms that saw no direct water. Moisture mapping on a pier-and-beam home must include crawlspace readings, under-house airflow, and the underside of the subfloor. Skipping the crawlspace is how you get a house that smells like mildew every time the Austin humidity spikes, even months after the original leak was “fixed.”
What this means for your restoration job:
- Ask whether your foundation type changes the drying plan. If the answer is a blank stare, that contractor does not understand Austin construction.
- Expect crawlspace inspection and possibly a sealed crawlspace drying setup on pier-and-beam homes. This adds time and cost but prevents mold from colonizing under your house.
- Slab homes need a check for water migration along the slab edge and under vinyl plank or floating floors. Water travels farther than it looks.
In our experience, Austin homes on clay soil consistently show moisture migration patterns that surprise homeowners. The leak is in the utility room, and the water is under the hall bathroom 25 feet away. That is the soil and the crawlspace doing the work. It is predictable once you know to look for it.
What the IICRC S500 Standard Actually Requires
The IICRC S500 is the water damage restoration industry’s reference document. It is a standard of care, not a law, which means it does not force any contractor to do anything. But your insurance policy likely references “industry standard” work, and the S500 is the document adjusters and attorneys point to when a claim goes sideways. Knowing what the S500 requires protects you legally with your insurer, because it lets you hold your contractor to an objective standard instead of their verbal promises.
The S500 requires, at minimum, that a restoration contractor:
- Classify the water loss into one of four classes based on the amount of water, the materials affected, and the evaporation rate. Class 1 is a small area with low porosity materials. Class 4 is deep saturation of hardwood, plaster, or confined spaces.
- Identify the water category as Category 1 (clean water from a supply line), Category 2 (gray water with contaminants, from a washing machine or dishwasher overflow), or Category 3 (black water containing sewage or flood water).
- Document initial moisture readings on all affected materials before drying begins.
- Set a drying goal for each affected material, based on the dry standard for that material type.
- Monitor progress daily and adjust the drying plan if the moisture levels are not coming down on schedule.
- Verify dryness with final readings that match the drying goal before removing equipment.
What you should ask for from any restoration company in Austin:
- “Can I see your moisture readings from today?” If they cannot show you numbers, they are not following the S500.
- “What class and category is my loss?” If they cannot tell you, they have not classified it.
- “What is your daily monitoring plan?” A proper drying job is checked every 24 hours, not left to run blind for four days.
- “What dry standard are you targeting for my hardwood floors?” There is a correct answer, and it is a number below the material’s equilibrium moisture content for Austin’s climate.
The S500 is not something any homeowner should need to read cover to cover. But asking these questions signals to your contractor and your adjuster that you are holding the job to a standard, and that changes the quality of the work you get.
The Cost Triggers That Jump a Job From Category 1 to Category 3
The difference between a $4,000 restoration job and a $14,000 restoration job is often one word: category. Category 1 water is clean water from a supply line, and Category 3 water is contaminated water from sewage, flood water, or extended stagnation. The category classification changes what gets removed, how it gets removed, and what the insurance company will pay for. It also creates the biggest pricing pressure point in the industry, because contractors are the ones doing the classifying.
Here are the most common Category 1 to Category 3 triggers in Austin:
- Time: Category 1 water that sits for 48 to 72 hours becomes Category 2 or 3, because standing water grows bacteria quickly in Austin’s warm indoor temperatures.
- Contact with building materials: Clean water that soaks through carpet, pad, and subfloor picks up contaminants from those materials.
- Source water temperature: Hot water from a water heater leak is more likely to support rapid microbial growth than cold water from a supply line.
- Appliance overflows: A washing machine or dishwasher overflow is Category 2 at minimum, because the water has been sitting in the machine and carrying soap residues and fabric debris.
- Toilet overflows: A toilet overflow that contains urine or feces is Category 3 immediately, regardless of how clean the rest of the bathroom looks.
- Outdoor water intrusion: Rain water, flood water, or drainage back-up is Category 3, because Austin’s clay soil and urban runoff carry contaminants.
How do you verify the classification yourself? Ask the contractor to show you the water source and explain the classification in front of you. A legitimate contractor will point to the shut-off valve or the appliance and walk you through the logic. If a contractor claims your clean supply line leak is Category 3 without showing you visible contamination, that is a red flag, because Category 3 billing is meaningfully higher. The written scope of work should state the category clearly, along with the line-item pricing that corresponds. A written scope with line-item pricing before work starts is the single best predictor of a job that does not balloon in cost. If the category changes during the job, that change should be documented in writing with a reason, not applied silently to the final invoice.
Pricing benchmarks for Austin, based on typical 1,500 to 2,000 square foot homes:
- Category 1, Class 2 water loss, no demolition beyond baseboards: $2,500 to $5,000.
- Category 2 water loss with moderate drywall demolition and drying: $5,000 to $9,000.
- Category 3 water loss with containment, full remediation, and rebuild: $10,000 to $20,000+.
- Emergency extraction only, call-out after hours: $400 to $900, depending on distance and time of night.
Insurance policies typically cover sudden and accidental water damage, but the category and the documentation determine how much gets paid. If you want the insurance conversation to go smoothly, the category needs to be stated in the scope, justified by evidence, and consistent with the moisture map and photos.
Common Mistakes to Avoid
- Waiting to call because you think it is small. A small leak under a sink in an Austin home can wick into the drywall within hours. Water follows the baseplate and the subfloor. A $400 extraction call is cheaper than a $6,000 mold job two weeks later.
- Hiring a contractor who does not use moisture meters. If the first tool out of the truck is a shop vac and not a moisture meter, the contractor is guessing. Guessing is how walls get closed up wet and mold appears six weeks later, which is exactly what happened across Austin after the 2021 freeze.
- Not photographing everything yourself. Before the contractor moves anything, take your own photos with your phone. Your photos are your memory. They will be the most useful evidence you have if the claim gets disputed.
- Agreeing to a verbal estimate. A verbal price is not a price. A written scope of work with line items is a price. If the contractor will not put it in writing before work starts, find a contractor who will.
- Letting the contractor skip the drying verification. The moment between drying and rebuild is the most important moment in the entire job. If no one checks moisture readings before the drywall goes back up, you are trusting fate.
- Paying in full before the job is done. A deposit is reasonable. Full payment before final verification and walkthrough is not. Your payment is your leverage, and the final walkthrough is when you use it.
- Treating every water event as the same. A supply line leak, a sewage backup, and a roof leak are three different jobs with three different protocols. A contractor who treats them identically is a contractor you should avoid.
When to Call a Professional
You should call a professional the moment you see water where it should not be, smell mold that you cannot locate, or notice a wall, ceiling, or floor that feels cool and damp to the touch in an area that has not been wet. Standing water is an obvious call. The less obvious calls matter just as much: a persistent musty smell in a bathroom with no visible leak, peeling paint or bubbling drywall, a water bill that spiked for no reason, or a crawlspace that smells earthy every time the Austin humidity rises. Those are all signs of water that has been moving where you cannot see it. Wendell Restoration Austin offers free estimates in Austin, call (325) 237-2088 and a live person answers, not a voicemail, not a callback queue, not a phone tree.
Frequently Asked Questions
Damage restoration in Austin typically costs between $3,500 and $17,000 depending on the square footage affected, the water category, and whether rebuild is included. A small Category 1 supply line leak with no demolition runs $2,500 to $5,000, while a Category 3 sewage loss with full remediation and rebuild can reach $20,000 or more on a larger home. Call (325) 237-2088 for an exact quote, estimates are free.
A live person answers our phone 24/7, and a technician can typically be on-site within hours of your call, not days. The arrival time you get is a live arrival time you can track, not a vague four-hour window. Water damage does not keep business hours, and neither does Wendell.
Most Austin homeowner’s policies cover sudden and accidental water damage, including burst pipes and appliance overflows, but coverage depends on the policy language and the cause. Your job is to document everything: photos, moisture readings, the written scope, and the category classification. Photo documentation and direct adjuster coordination are part of every Wendell job, because that documentation is what turns a contested claim into a paid one.
If the water is clean, the area is small, and the material can dry completely within 48 hours, you may only need extraction and drying. If the water sat for more than 48 hours, or the source was contaminated, or the material is porous and has absorbed water into its core, full remediation is the only way to prevent mold from blooming inside the wall. Cleaning the surface of a wet wall addresses the outside, not the inside.
Most residential water damage jobs in Austin take 5 to 14 days from first call to final walkthrough. Emergency extraction and initial drying setup happen in the first 4 hours. Structural drying runs 3 to 4 days. Remediation takes 1 to 3 days depending on scope. Rebuild runs 3 to 7 days. Larger losses with significant rebuild can run 2 to 4 weeks.
We coordinate directly with your adjuster, providing the moisture logs, category classification, photo documentation, and line-item scope they need to evaluate the claim. You should not have to translate between a contractor and an adjuster. The goal is a written scope, documented evidence, and a clear payment path, with you kept informed at every step.
The Bottom Line
Damage restoration in Austin is a sequence of phases, not a single event, and each phase has a failure point that costs real money when skipped. Extraction without drying means mold in six weeks. Drying without moisture mapping means you cannot prove the work was done. Remediation without category classification means billing disputes with your insurer. Rebuild without a written scope means cost overruns. The pattern is simple: documentation and written pricing protect you at every step. Austin’s clay soil and pier-and-beam foundations make this harder than the national average, not easier. Hire a contractor who documents everything, prices everything in writing before work starts, and puts a guarantee on paper. That is the whole game. Wendell Restoration Austin’s home page has more on how we operate, and you can call (325) 237-2088 for a free estimate, answered by a live person, any hour of the day or night.
Written by Blake Sorensen, Owner at Wendell Restoration Austin, serving Austin since 2006.
See the difference
 Before
 After
After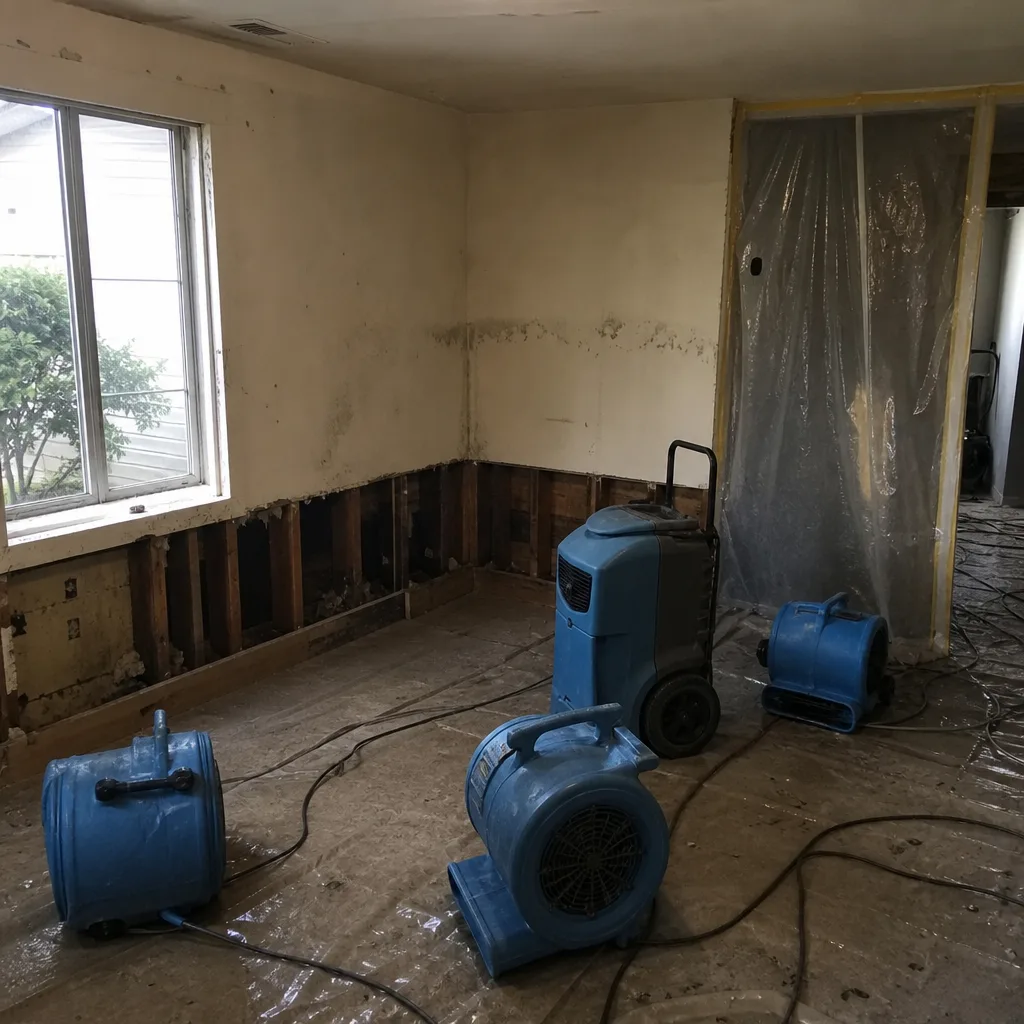 Before
 After
After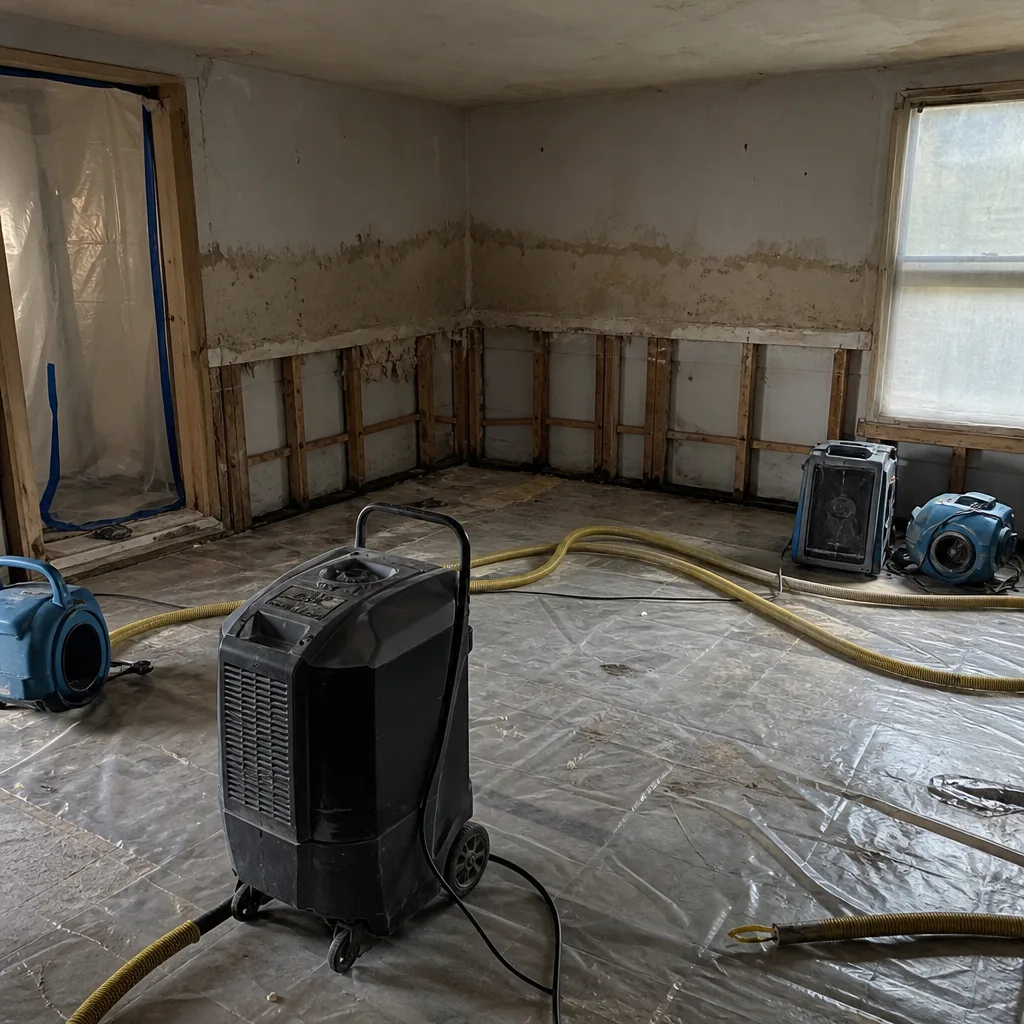 Before
 After
After